Neep Help on Stormtrooper Amour
-
Frodo,Naruto,Weirdo

- Posts: 1550
- Joined: Fri Aug 08, 2008 8:54 am
USD600 is reasonable... with the exchange rate taken into consideration... just my scout armour alone costs me around USD400. bucket will be another USD200. i still have some other soft parts(overall, vest & cumberbund), whereas trooper soft part consists mainly of the suit. if time=money, then trooper definitely cost u less money(time). 
I'm a clean scout, so dun dirty my armour on purpose.
Ron, here are some photos showing the progress of yr helmet assembly. It will also give an idea of whats required in assembling a stormtrooper helmet kit.
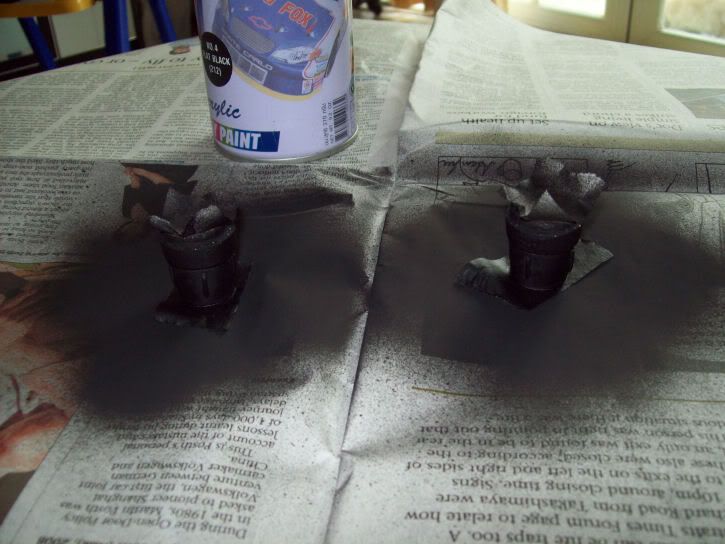
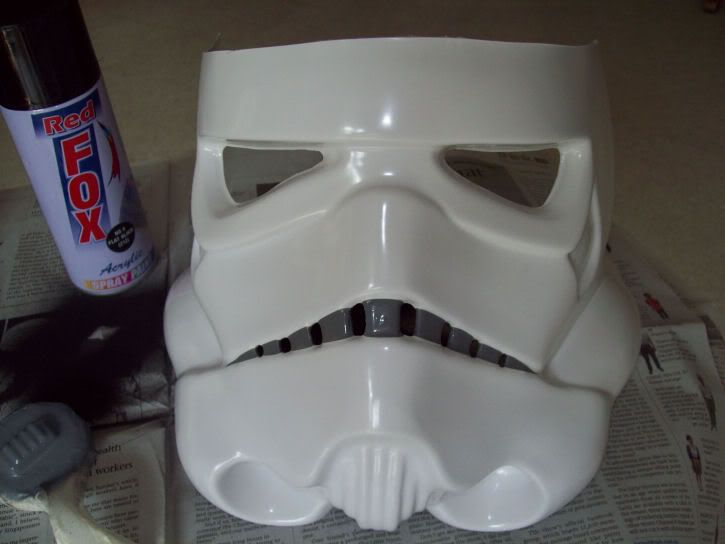
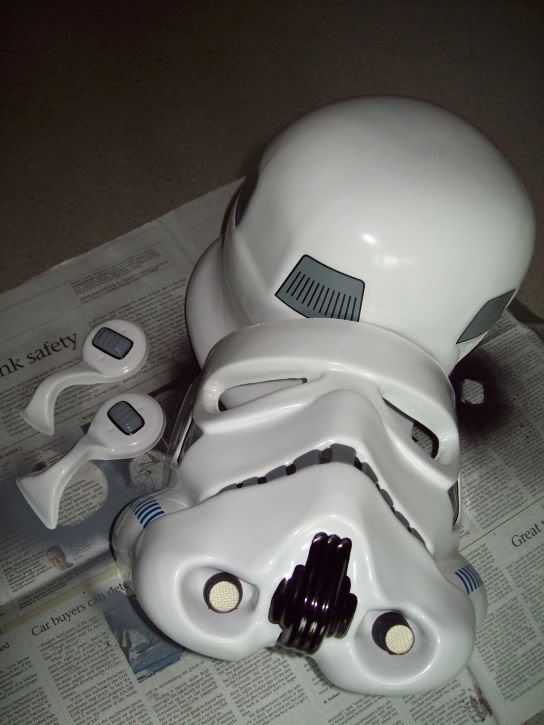
Step 1. Paint the resin aerators black. I taped the top and bottom of the aerators and sparayed the sides black. I will later touch up the paint manually with a brush.
Eye and frown holes are cut out. If you remember the kit photos, these were not cut out.
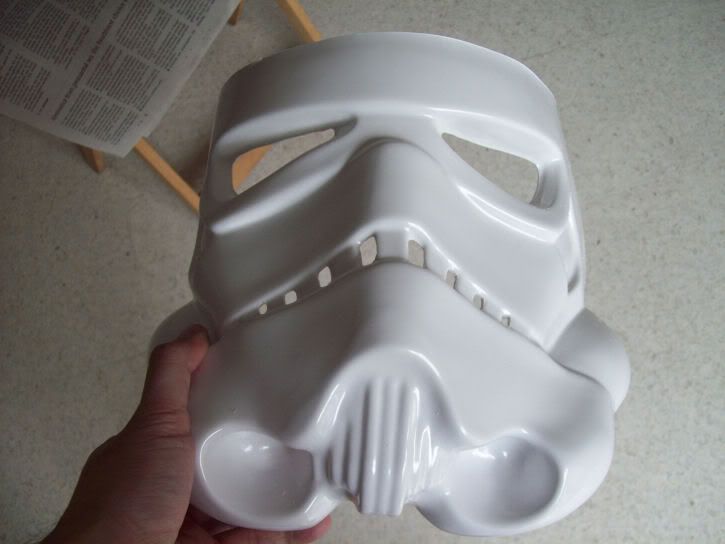
I then proceeded to sand the inside of the holes to smoothen them. Then wrapped grey electical tape around the individual teeth of the frown. I prefer this method to painting the frown as its much neater and you can redo anything if yr not happy with it. This tedious process though better, took me about 2 hrs to complete something I was happy with.
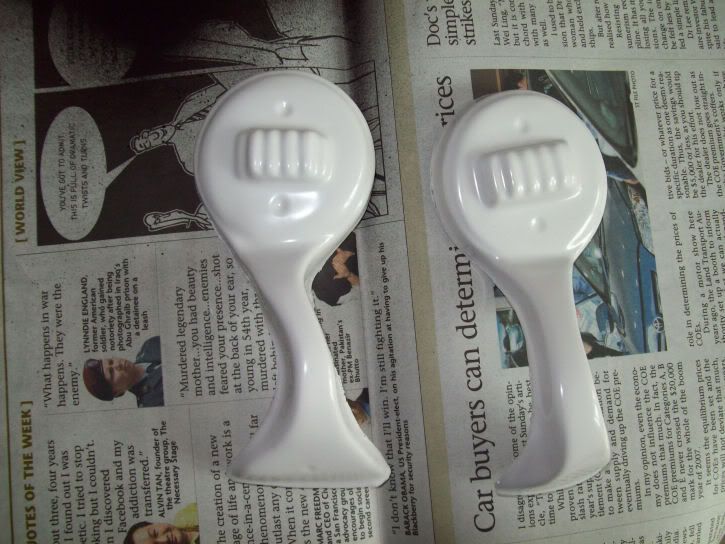
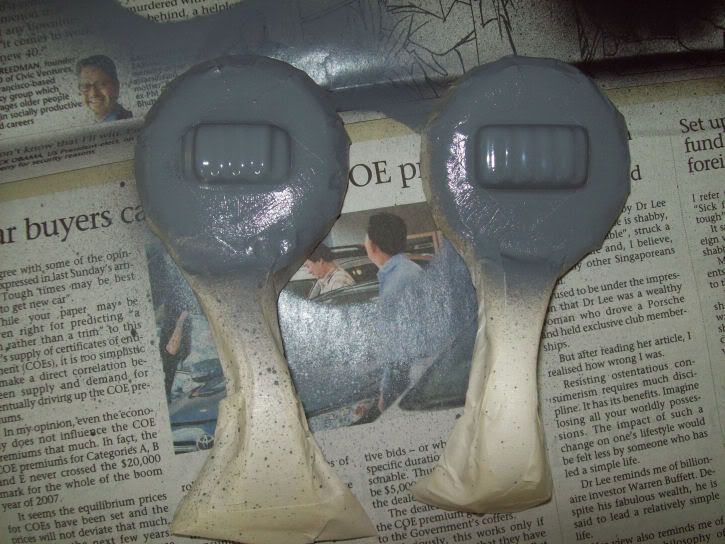
Next, the ear pieces are cut out, 3 holes are drilled into each where the screws will fit later. Ear rectangles are masked and sprayed grey. Later, hand painted with the black outline.
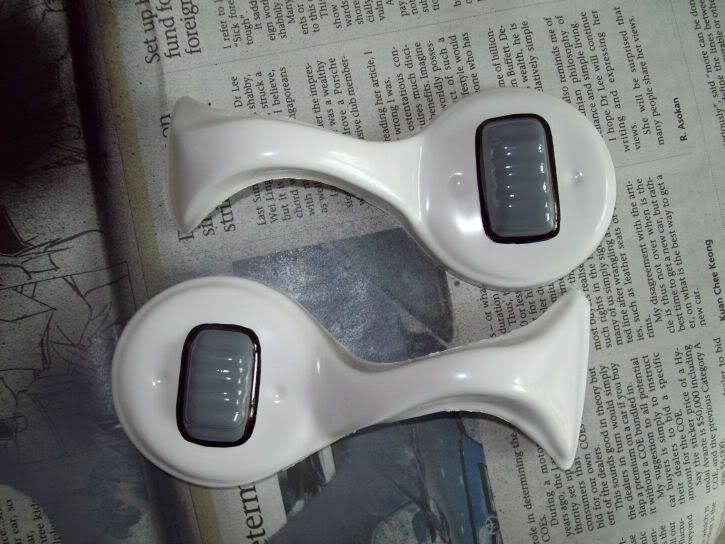
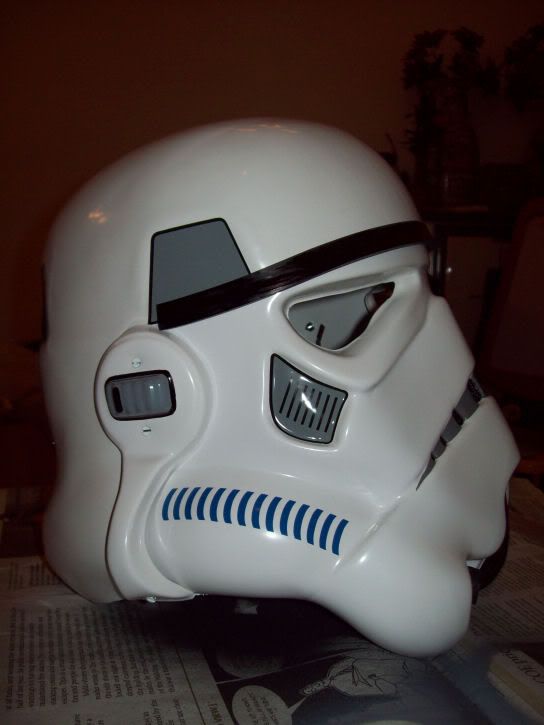
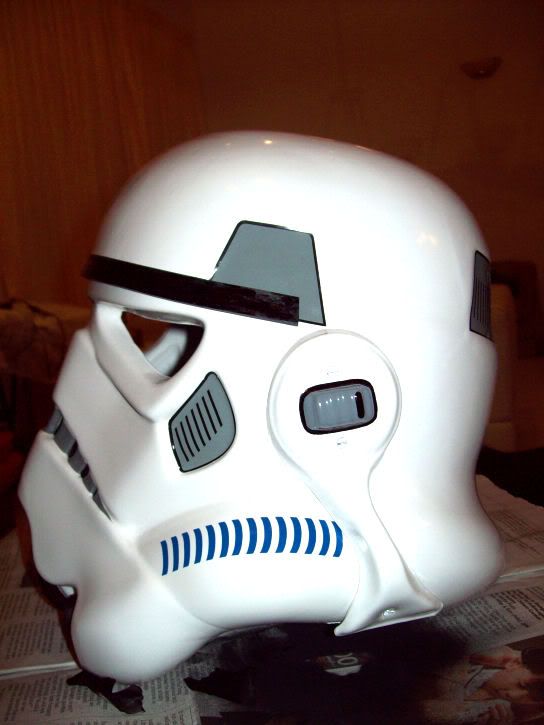
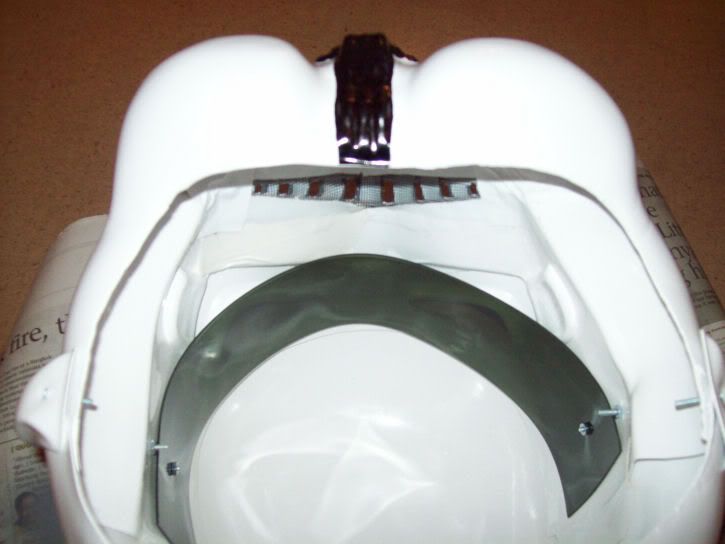
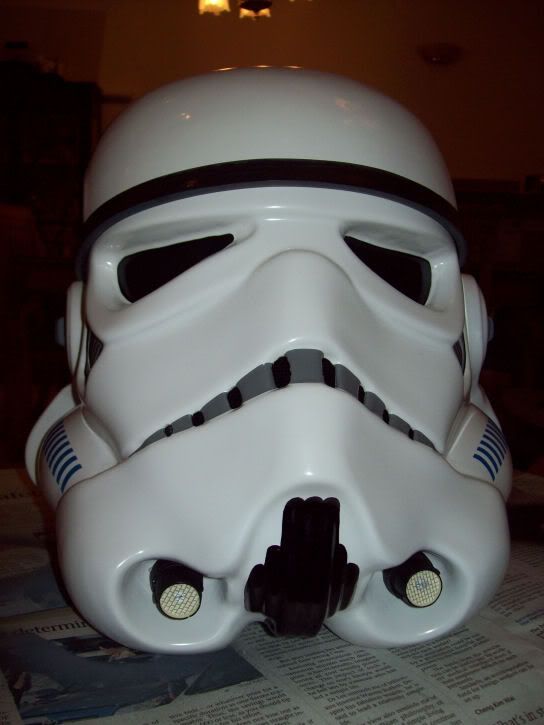
The ears have been sanded on the edges to smoothen them. I've also painted the face plate chin area black by hand and added all the helmet decals. Also, since its not assembled yet, I proceeded to install the newly painted aerators with the gauze fronts and also secured black mesh behind the frown area. Now its ready for assembly!
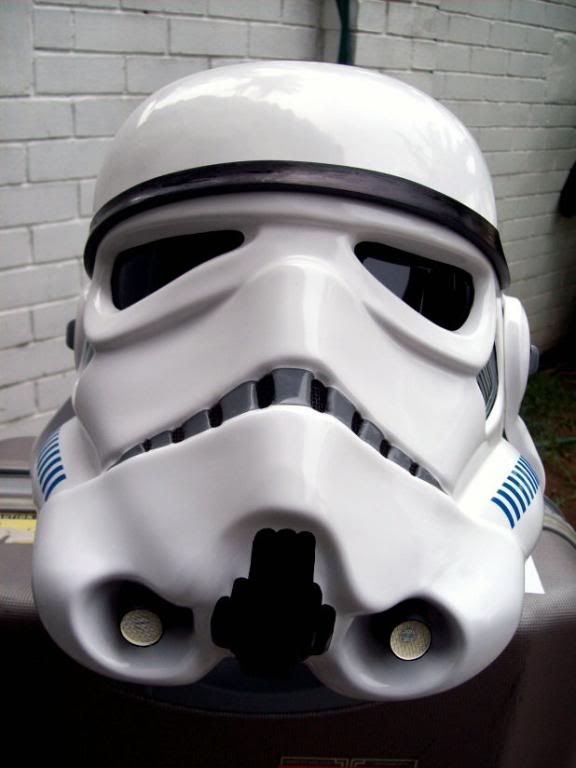
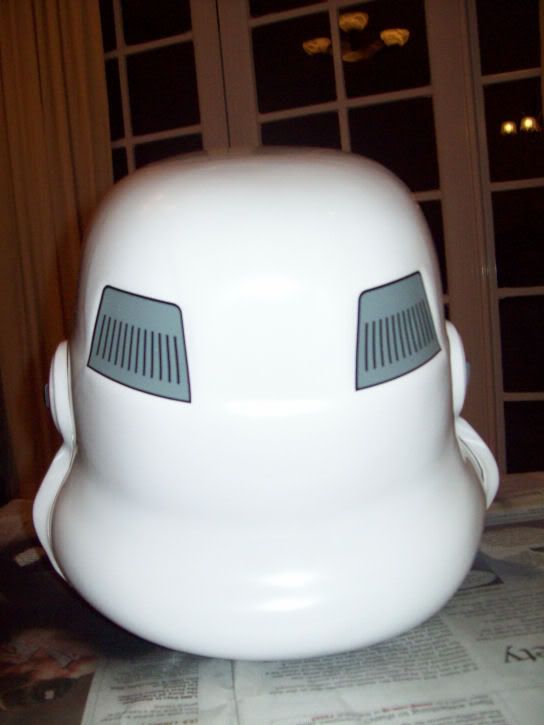
Here's what I've assembled and I'm happy with. The ears aren't on yet. Neither is the lense material.
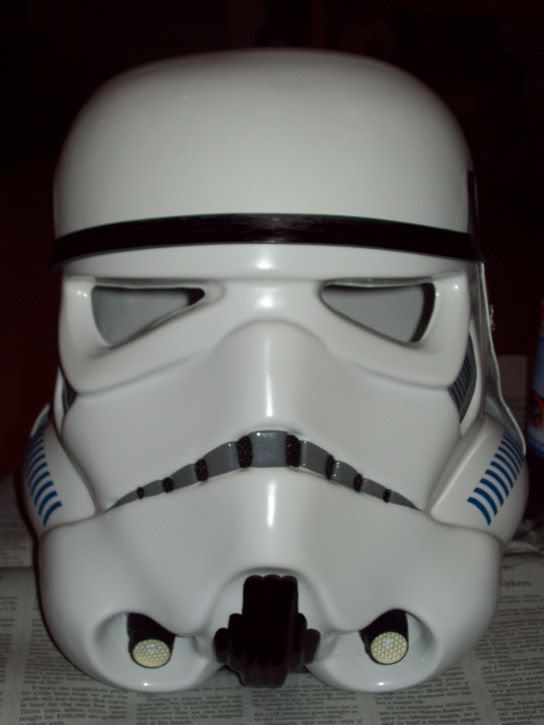
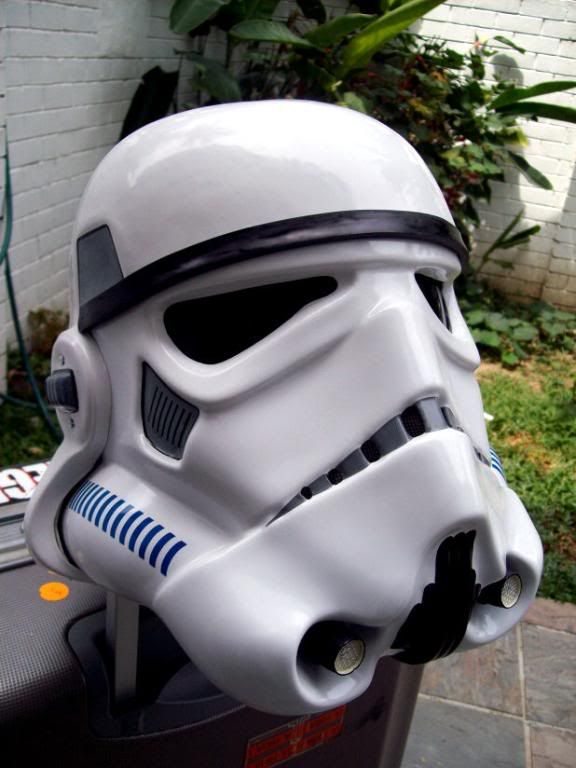
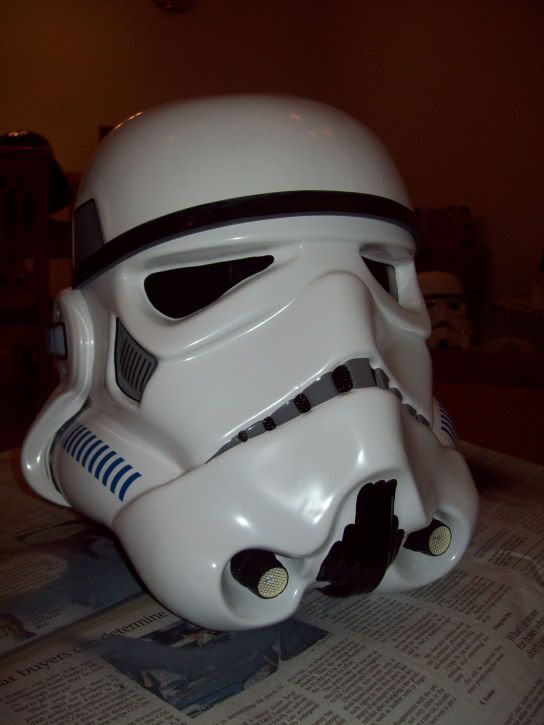
Ears have been added by drilling using the ear holes drilled earlier as pilot holes to drill into the sides of the helmet. Each ear is then secured by 3 sets of nuts and bolts onto the side.
Lens material installed. I just drilled a hole on each end of the material and secured it onto the inside screws that were from the ears using a nut.
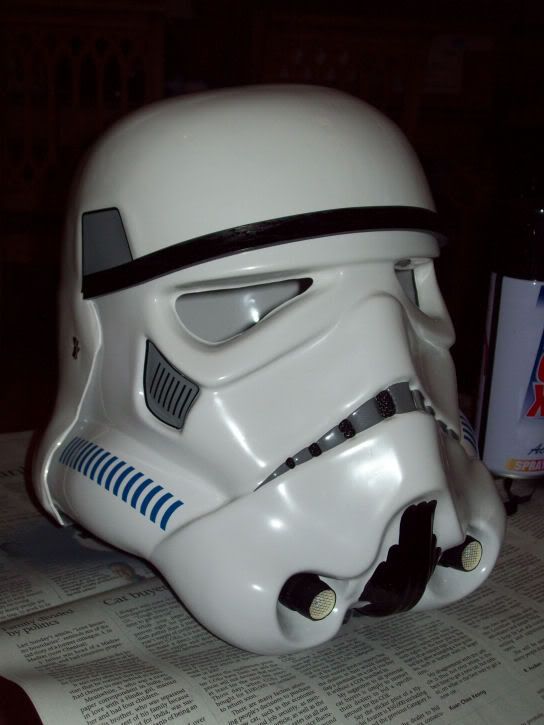
Comparison next to my other TK helmet.
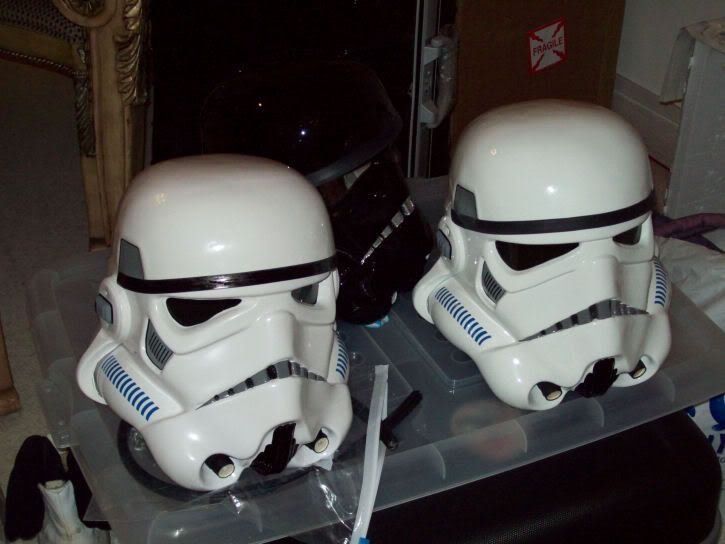
Later today I'll start to trim out the other parts of the armor. I'm also thinking of cutting the helmet eyes a bit bigger....they look too small to me. Take a look again and see what I mean.
Next update coming up soon.
Step 1. Paint the resin aerators black. I taped the top and bottom of the aerators and sparayed the sides black. I will later touch up the paint manually with a brush.
Eye and frown holes are cut out. If you remember the kit photos, these were not cut out.
I then proceeded to sand the inside of the holes to smoothen them. Then wrapped grey electical tape around the individual teeth of the frown. I prefer this method to painting the frown as its much neater and you can redo anything if yr not happy with it. This tedious process though better, took me about 2 hrs to complete something I was happy with.
Next, the ear pieces are cut out, 3 holes are drilled into each where the screws will fit later. Ear rectangles are masked and sprayed grey. Later, hand painted with the black outline.
The ears have been sanded on the edges to smoothen them. I've also painted the face plate chin area black by hand and added all the helmet decals. Also, since its not assembled yet, I proceeded to install the newly painted aerators with the gauze fronts and also secured black mesh behind the frown area. Now its ready for assembly!
Here's what I've assembled and I'm happy with. The ears aren't on yet. Neither is the lense material.
Ears have been added by drilling using the ear holes drilled earlier as pilot holes to drill into the sides of the helmet. Each ear is then secured by 3 sets of nuts and bolts onto the side.
Lens material installed. I just drilled a hole on each end of the material and secured it onto the inside screws that were from the ears using a nut.
Comparison next to my other TK helmet.
Later today I'll start to trim out the other parts of the armor. I'm also thinking of cutting the helmet eyes a bit bigger....they look too small to me. Take a look again and see what I mean.
Next update coming up soon.
TK4546 <BOSS>
501st Legion
501st Legion
-
Gordonator
- Posts: 4077
- Joined: Fri Oct 17, 2008 9:01 pm
That black stripe is called the 'brow'. For stunt helmets its lifted higher as how I've done it. Hero helmets have it lower, to just above the eyes. So to answer yr question, having it this way is more movie accurate.Gordonator wrote:wow keith that looks awesome! just a question, will the black stripe on the forehead look better if it's on the edge? or is it required to be that way?
TK4546 <BOSS>
501st Legion
501st Legion
-
Lestrooper
- Posts: 477
- Joined: Thu Jul 31, 2008 6:06 pm
- Location: Singapore
-
Frodo,Naruto,Weirdo
- Posts: 1550
- Joined: Fri Aug 08, 2008 8:54 am
Keith bro, care to explain more abt stunt helmet n hero helmet? thanks!mosske wrote:That black stripe is called the 'brow'. For stunt helmets its lifted higher as how I've done it. Hero helmets have it lower, to just above the eyes. So to answer yr question, having it this way is more movie accurate.Gordonator wrote:wow keith that looks awesome! just a question, will the black stripe on the forehead look better if it's on the edge? or is it required to be that way?
I'm a clean scout, so dun dirty my armour on purpose.
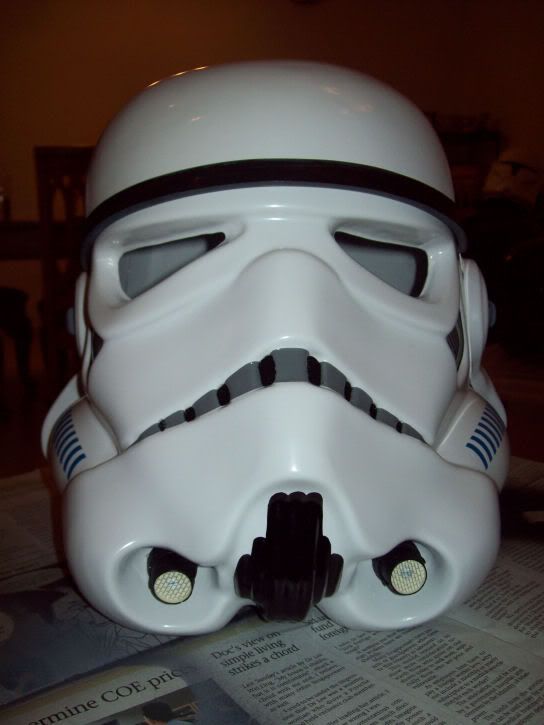
Sure bro. There were 2 kinds of stormtrooper helmets used in Star Wars EP4. The hero helmets are made for the troopers who had close up scenes with the camera, Eg. Luke & Han in stormtrooper armor, one of the stormtroopers standing in front of the falcon in the death star landing bay as the scanning crew enters. The difference between the hero helmet and the stunts are:Frodo,Naruto,Weirdo wrote:Keith bro, care to explain more abt stunt helmet n hero helmet? thanks!
1. Hero helmets have smoke grey bubble lenses vs the stunt that uses flat dark green lenses.
2. The hero helmet has a lower brow which is meant to make it look fierce. The stunt has a higher lifted brow.
3. The hero helmet has a shorter frown. The frown is the grey area over the helmet's nose area below the eyes. The hero helmet only has 6 frown holes - 3 on each side. The stunt's frown is longer, having 8 frown holes - 4 on each side.
4. The ears of the hero helmet have 2 screws on each side, one above the grey rectangle and another at the bottom of the ear. The stunts have 3 screws on each ear, one above the grey rectangle, one below the grey rectangle and one at the bottom of the ear.
There are quite a few other differences, materials, detailing paintwork, mic tips (aerators), etc. But what I've mentioned are the major ones.
Here are some comparison pics of actual screen used helmets. Stunt on the left, hero on the right.


TK4546 <BOSS>
501st Legion
501st Legion
-
Lestrooper
- Posts: 477
- Joined: Thu Jul 31, 2008 6:06 pm
- Location: Singapore
Both can qualify for membership but you have to see the helmet kit, if its a hero or stunt. Ron's for example is clearly a hero. You can tell by the ears, there are dimples where the screw holes should be drilled. Also, it comes provided with flat green lens material...although that can be changed.Lestrooper wrote:I like the hero version. Look more fierce.
But can the hero version pass the 501 standard?
Most of the 501st prefer the stunt helmets becos the flat lenses allow better vision than bubble lenses that distort yr view. As for the brow, its up to the individual if they wish to have it raised or lowered. Lower looks fiercer but not so accurate for a stunt helmet. In time, as you become more serious about going full accurate, these little things will come into play. For the time being, its up to you.
Personally, I used to prefer the lower brow but now I prefer a raised brow...it just looks more like the real stunt stormtroopers.
TK4546 <BOSS>
501st Legion
501st Legion
-
Gordonator
- Posts: 4077
- Joined: Fri Oct 17, 2008 9:01 pm