Don Post tie helmet in the making
Posted: Tue Feb 28, 2006 9:58 pm
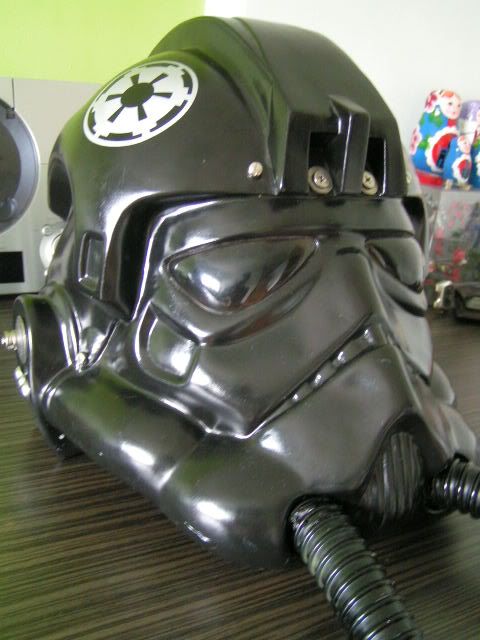
i like to share with other members who have intention or in the making that is really worth spending time to work on the helmet ..and hope this will encourage all of u..
I used to perceived that that suiting up ur helmet is tedious and troublesome task but after handson on the helmet...i really felt the belonging sensations and satisfaction despite the time and effor spend on the helmet which i have probably touch it tonnes of times while fixing up the accessories up and here are just some of the pictorial to share my progress.
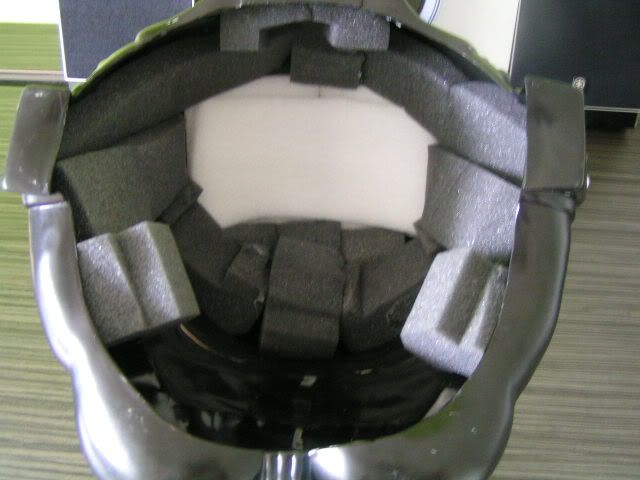
cushioning the helmet
i m glad that to work in an IT environment which gives me the chances of scavenging alot of leftovers like bolts and nuts which are very useful..and one of it is a server and laptop cushioning when they shipped new equipment to us...the cushioning was precut into right size so i didnt spend much time reshaping it and also with certain larger block of sponge ...i can afford to make a cushioning support apart from the headliner
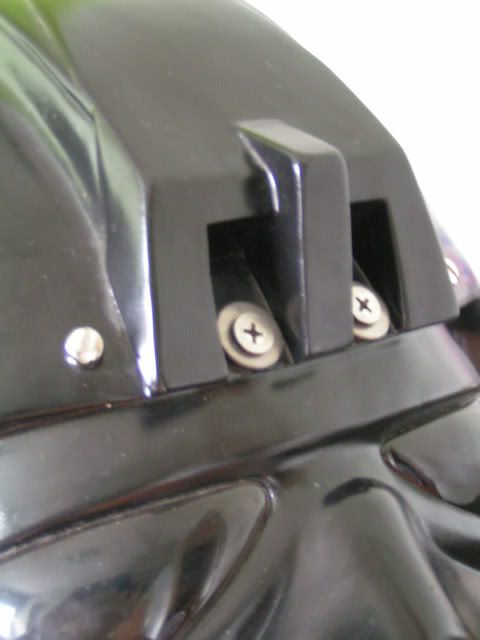
wiring the fan to the helmet
i seen in this forum alot of wiring techniques and first of all i like to thank jawaman for advicing me on the wiring part of the chestbox which the schematic is really helpful. I have gone to the extend to only fix a pair fan set for the helmet which has been a challenge for donpost due to the shape of chin...what i found out is that using 50mA fan is the best cos not only it can generate breeze due to its power but also u can use a probably smaller 12v battery then a 9v battery thus saving alot of space for it...and with an on/off switch installed as well
initial wiring process for the fan
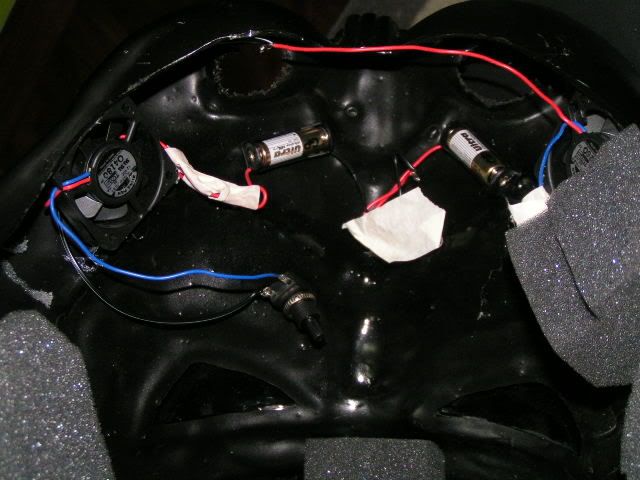
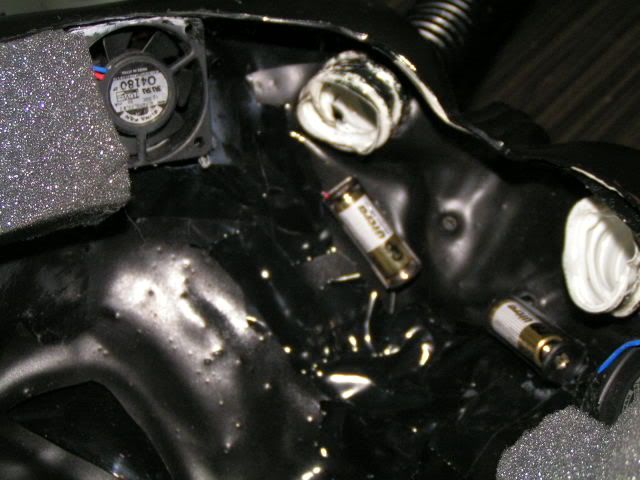
completed and masked battery and fan wiring
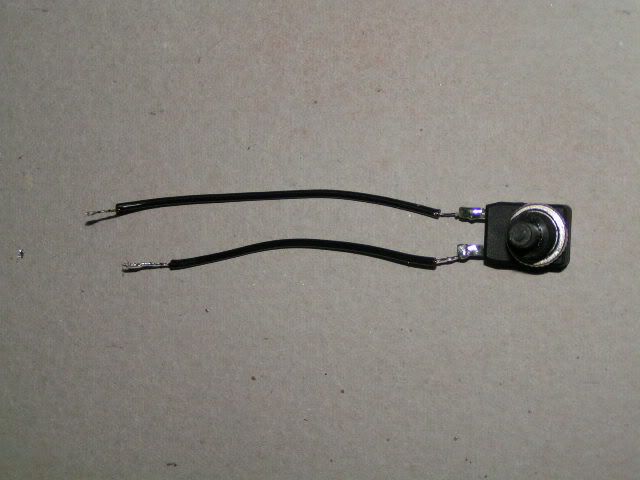
the switch concealed at the side of helmet
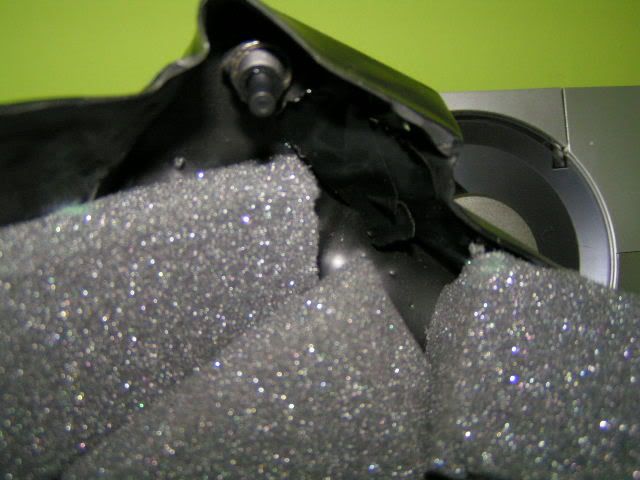
this is kind of on/off switch i used for both chest box and helmet circuit
Greeblies installation
with good friend and also a vampire squadron member getzjedi ....i was able to acquire the washers and bolts thru him and also i have taken a few items out from harddisk to use it for the greeblies on the side...here are some of the pics
3 button ( not sure what names are those below greeblies)
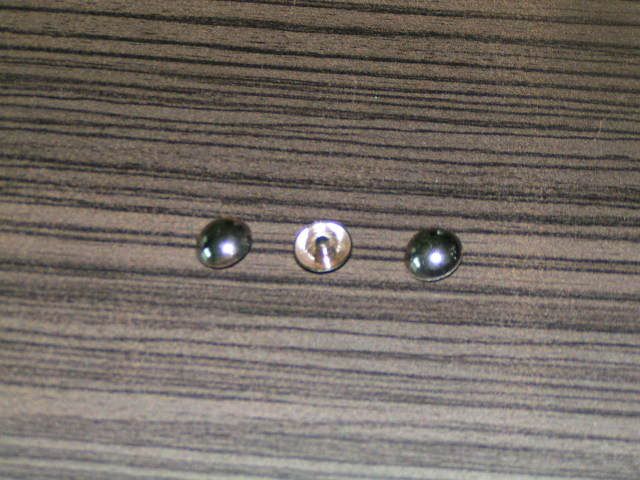
i have made it as such that i was using a round surface bolts found in the toolbox...searching thru this forum...i have only seen members putting in LED but not bolt..so intend to try and attempt for a change which i m not sure is it canon to do so but personally i think is cool cause it draw attention having some metal relfective part
fixing progress of the 3 buttons
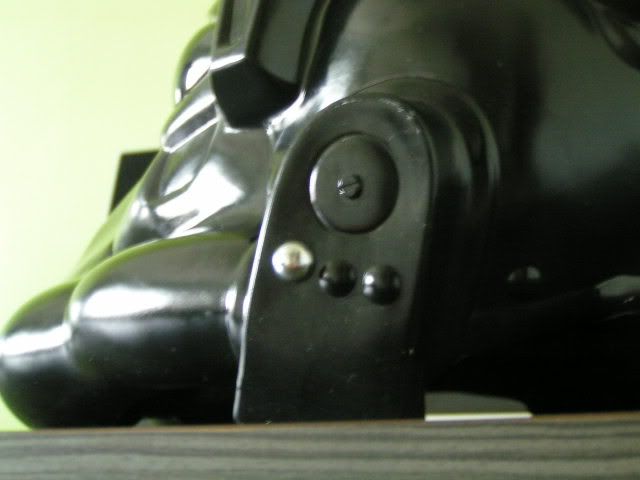
finished work of the 3 buttons
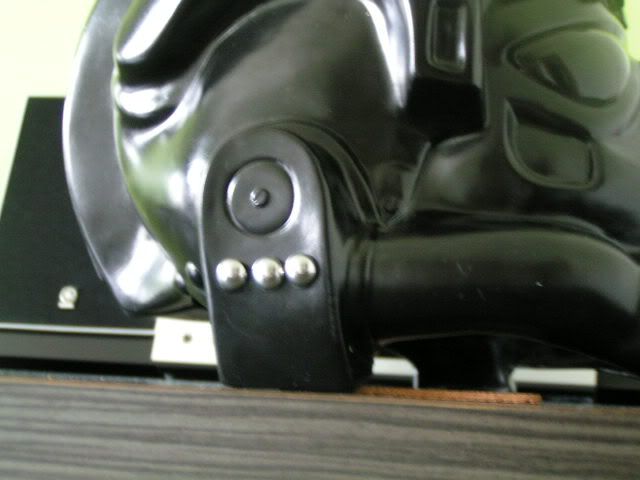
the harddisk roller from an IBM desktop harddisk proof to be useful to illustrate the protuding effect though i wish i can find something more egg shaped like item.
side Greeblies ( up close)
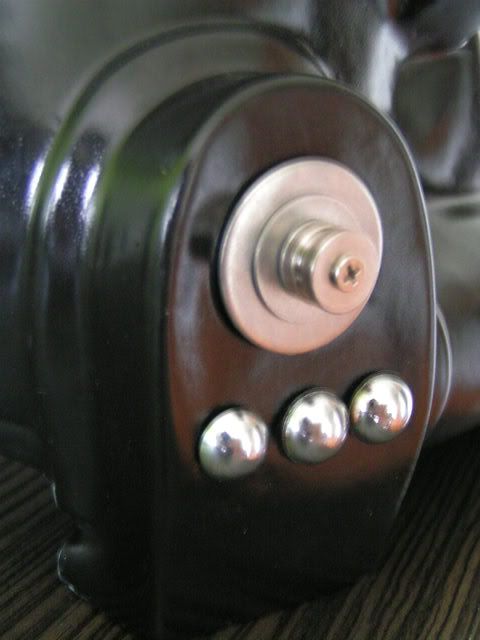
top view of the greeblies
all in all i m a happy pilot now awaiting to be recruited...and thks for all the information, encouragement and sharing from the forum that allow me to complete the helmet with minimal difficulty
I used to perceived that that suiting up ur helmet is tedious and troublesome task but after handson on the helmet...i really felt the belonging sensations and satisfaction despite the time and effor spend on the helmet which i have probably touch it tonnes of times while fixing up the accessories up and here are just some of the pictorial to share my progress.
cushioning the helmet
i m glad that to work in an IT environment which gives me the chances of scavenging alot of leftovers like bolts and nuts which are very useful..and one of it is a server and laptop cushioning when they shipped new equipment to us...the cushioning was precut into right size so i didnt spend much time reshaping it and also with certain larger block of sponge ...i can afford to make a cushioning support apart from the headliner
wiring the fan to the helmet
i seen in this forum alot of wiring techniques and first of all i like to thank jawaman for advicing me on the wiring part of the chestbox which the schematic is really helpful. I have gone to the extend to only fix a pair fan set for the helmet which has been a challenge for donpost due to the shape of chin...what i found out is that using 50mA fan is the best cos not only it can generate breeze due to its power but also u can use a probably smaller 12v battery then a 9v battery thus saving alot of space for it...and with an on/off switch installed as well
initial wiring process for the fan
completed and masked battery and fan wiring
the switch concealed at the side of helmet
this is kind of on/off switch i used for both chest box and helmet circuit
Greeblies installation
with good friend and also a vampire squadron member getzjedi ....i was able to acquire the washers and bolts thru him and also i have taken a few items out from harddisk to use it for the greeblies on the side...here are some of the pics
3 button ( not sure what names are those below greeblies)
i have made it as such that i was using a round surface bolts found in the toolbox...searching thru this forum...i have only seen members putting in LED but not bolt..so intend to try and attempt for a change which i m not sure is it canon to do so but personally i think is cool cause it draw attention having some metal relfective part
fixing progress of the 3 buttons
finished work of the 3 buttons
the harddisk roller from an IBM desktop harddisk proof to be useful to illustrate the protuding effect though i wish i can find something more egg shaped like item.
side Greeblies ( up close)
top view of the greeblies
all in all i m a happy pilot now awaiting to be recruited...and thks for all the information, encouragement and sharing from the forum that allow me to complete the helmet with minimal difficulty